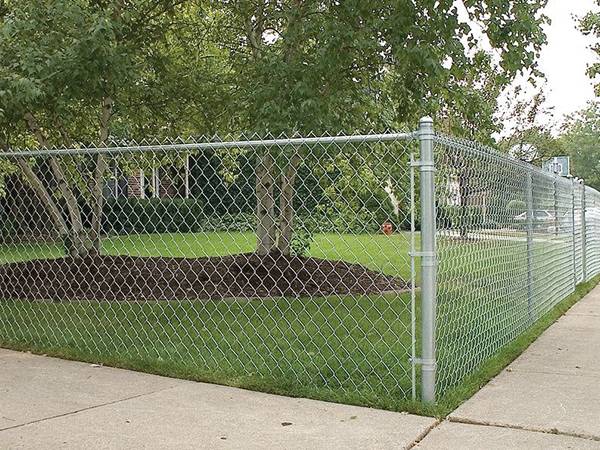
Chain link fence in park

Chain link fence is made of galvanized wire, PVC coated wire and other materials. Galvanized chain link fence has the characteristics of strong corrosion resistant performance and long service life, while black or green plastic coated chain link fence can be well integrated with the yard and environment, thus enhancing its beauty. Because of its easy installation and strong protection, it is widely used in yards, stadiums, etc.
The installation of chain link fence is very easy. We have prepared the detailed installation steps. You can refer to them and make your project more smooth and efficient.
Before you install your chain link fence, you need to lay out your fence area, confirm the covered area and the quantity of accessories. You can also just tell us the area and layout you need to cover, and we will provide you with a complete range of chain link fence as well as accessories.
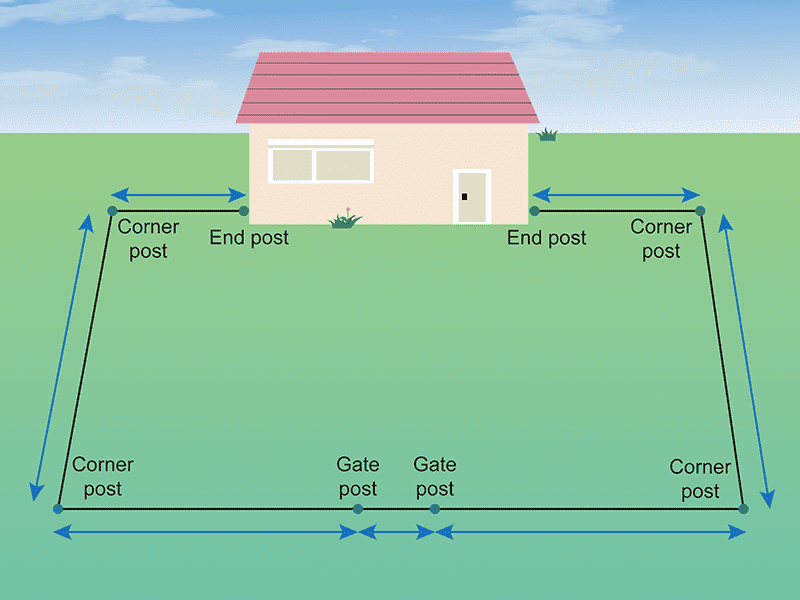
Layout the fence
Gather materials
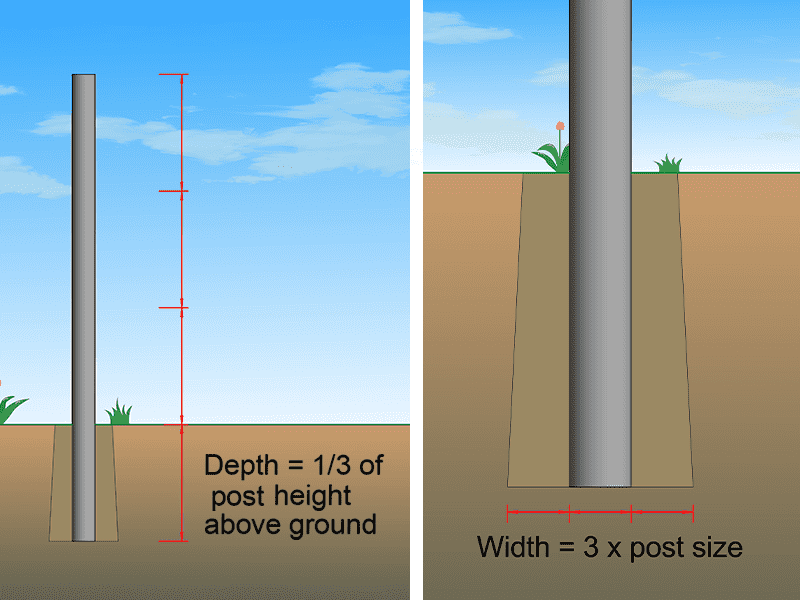
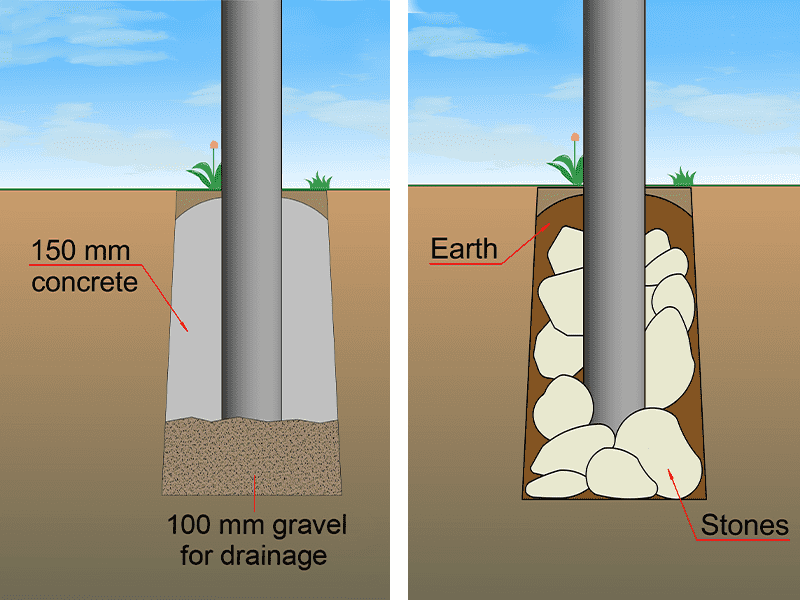
Prepare post holes
You can choose to stabilize the foundation with concrete and gravel or stone and earth.
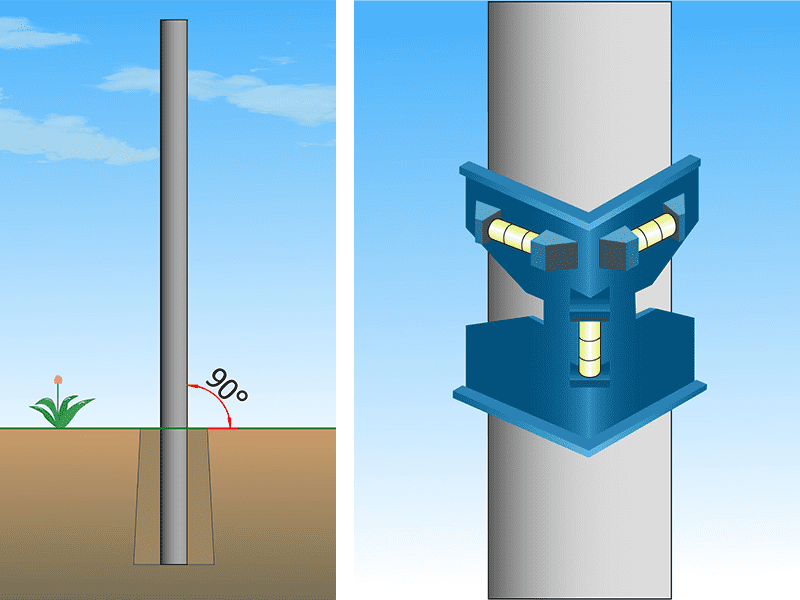
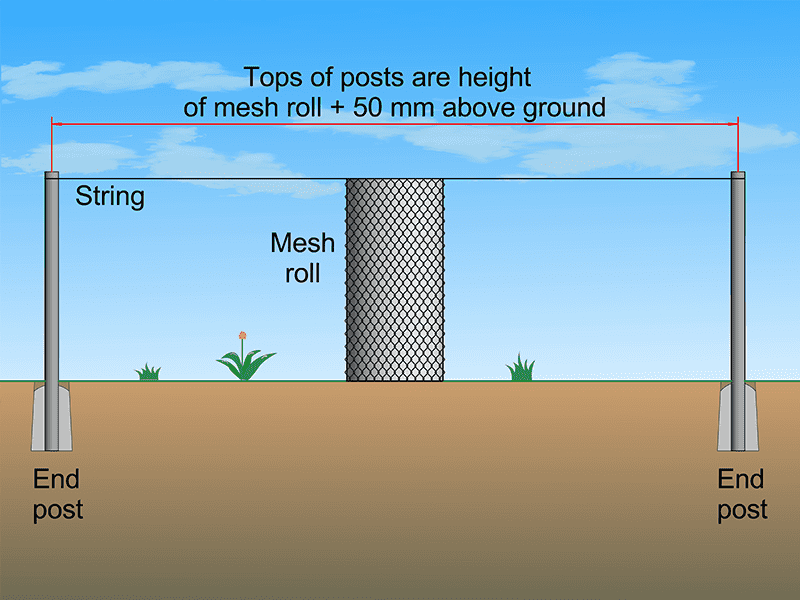
Set end posts
Use a carpenter's level or plumb line to check the balance. This is important otherwise your fence will not be straight.
Set end posts
Intermediate posts will be required for longer stretches of fence. (Using the example of a 9 m chain link fence)
Set intermediate posts
Mark the intermediate post position, which is commonly 3 meters between the corner posts. And then install the intermediate posts, the installation method is same as the end post installation (Step 2)
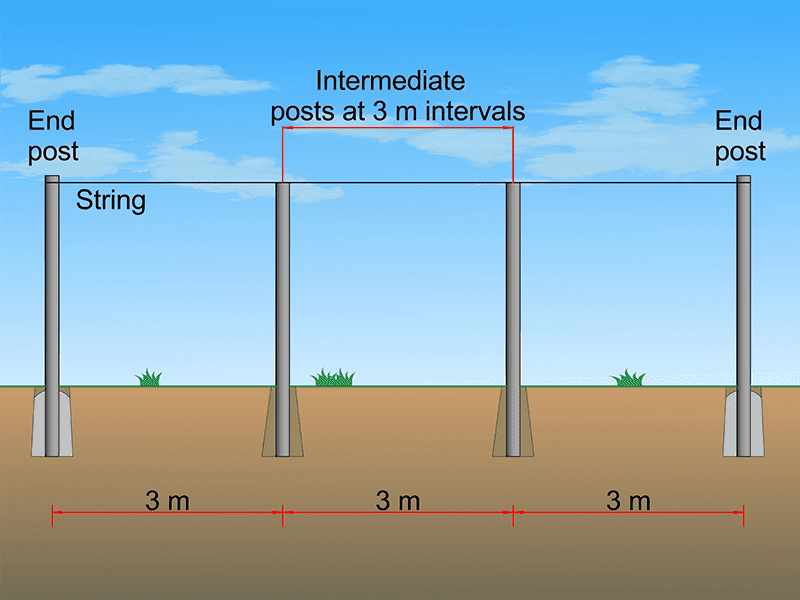
Mark intermediate posts with 3-m interval
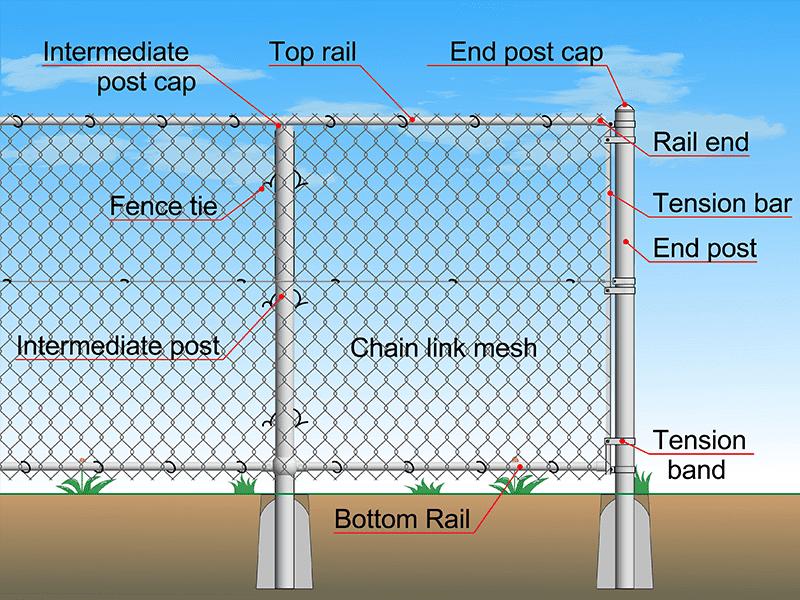
Tension bands quantity varies depending on the fence height and posts types.
It is used to fasten the top and bottom rail onto posts and the quantity varies depending on the post types.
It is used to fasten the rail ends onto posts and 1 piece is needed for each rail end.
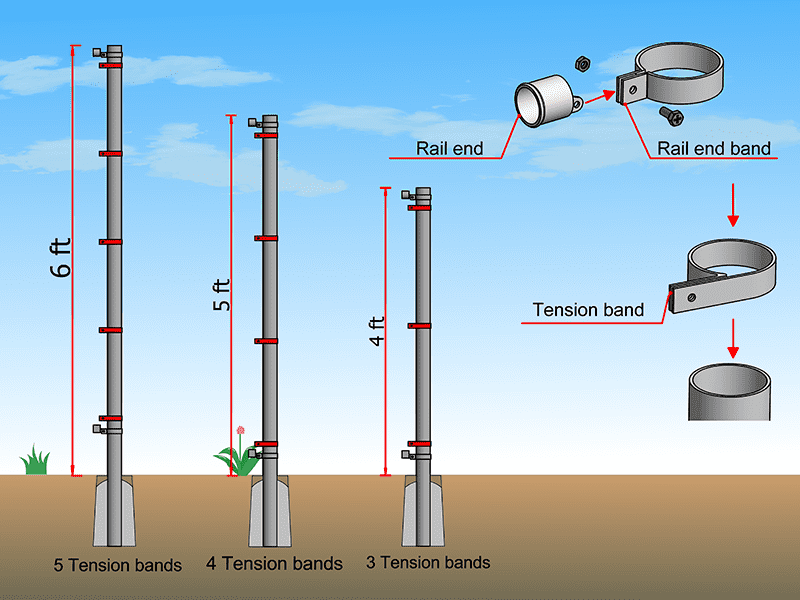
Rail end, tension band & rail end band
Drive caps onto the posts with a mallet. Put the posts in their holes.
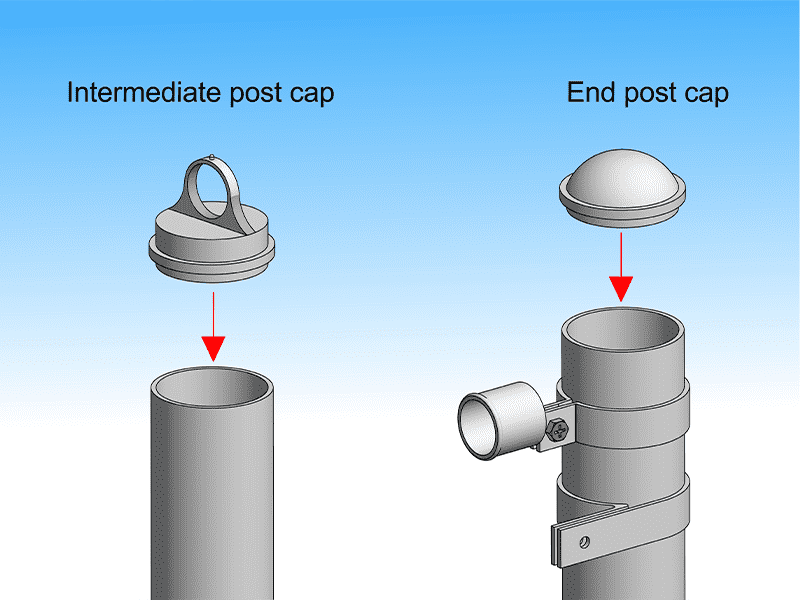
Intermediate end post cap and end post cap
After installing the end posts and the intermediate posts and capping them, start installing the top rail and the bottom rail.
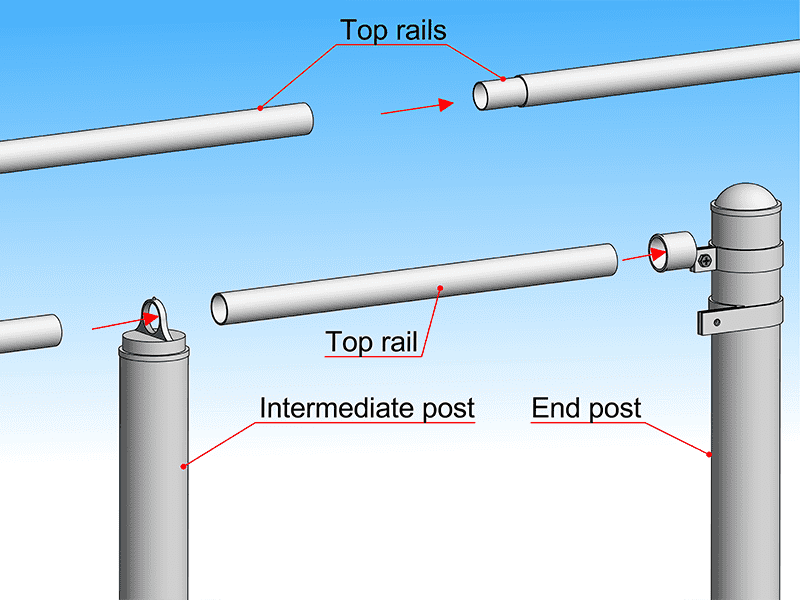
Top rail installation
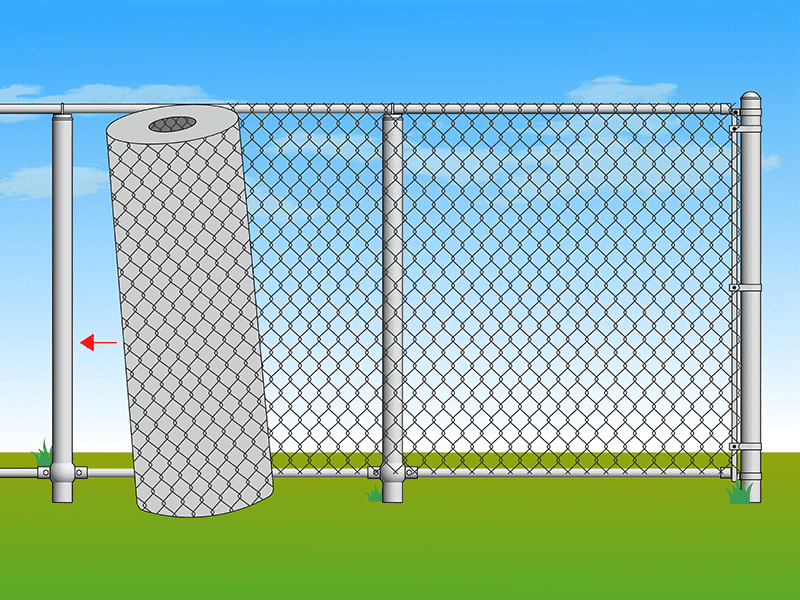
Start from one of your end posts and unroll your mesh along the length of your fence.
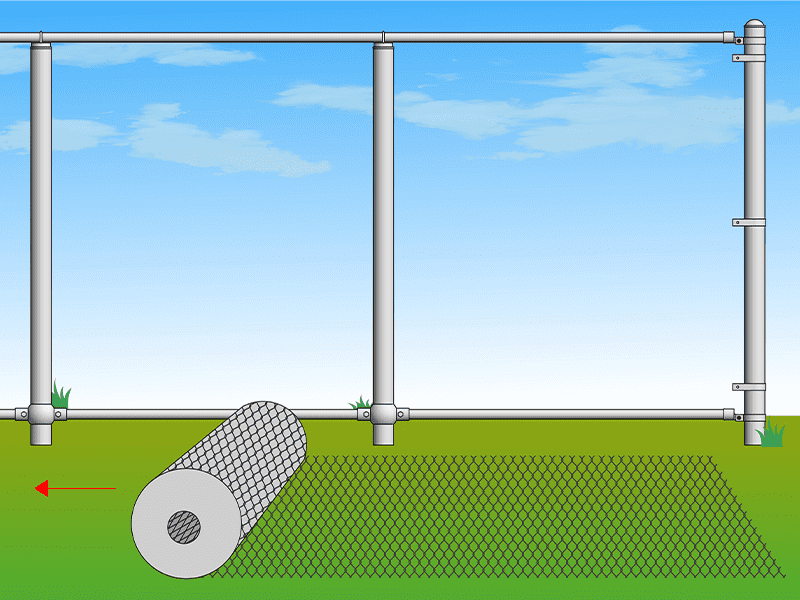
Chain link mesh unfolding
Slide a tension bar vertically through the starting end of the mesh roll. This will stiffen the mesh so that you can attach it to the fence posts and rails.
Tension bar installation
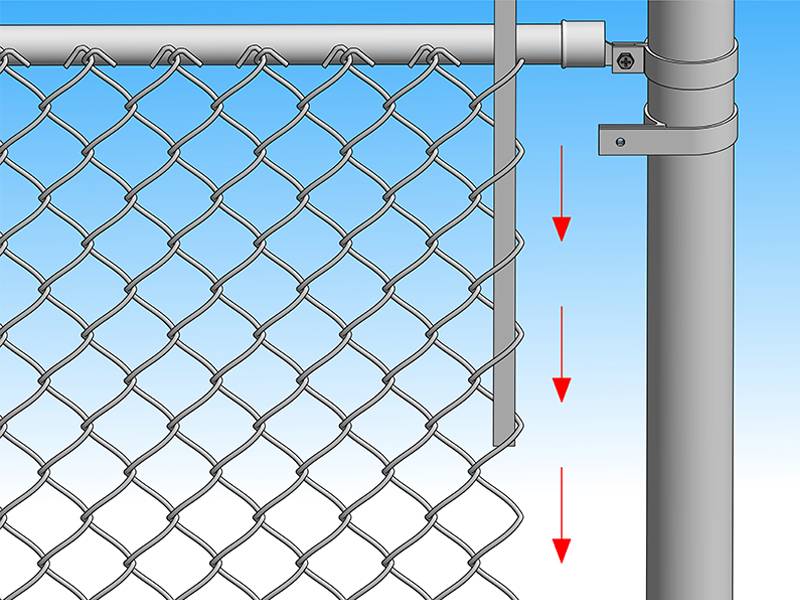
Fasten the tension bar to the end posts' tension bands. The mesh should overlap the rail by 250 to 500 mm and be about 50 mm (2 inches) off the ground.
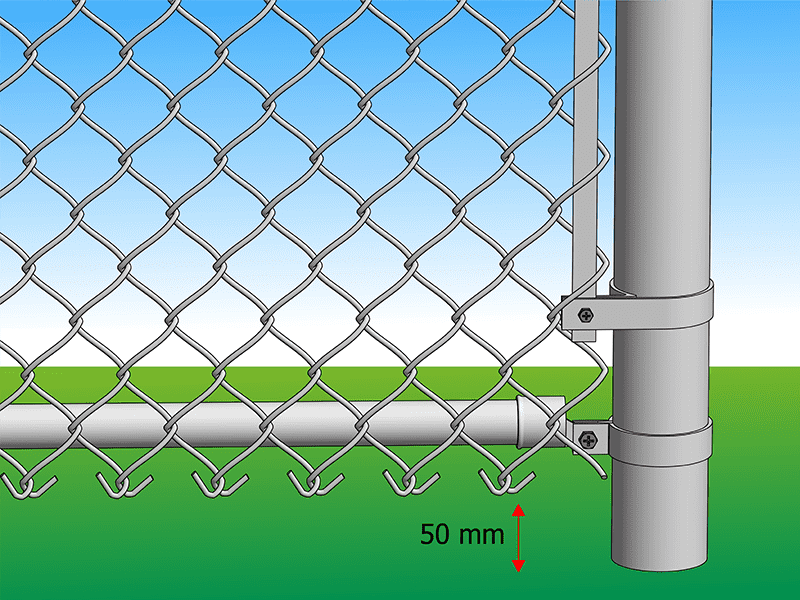
50 mm off the ground
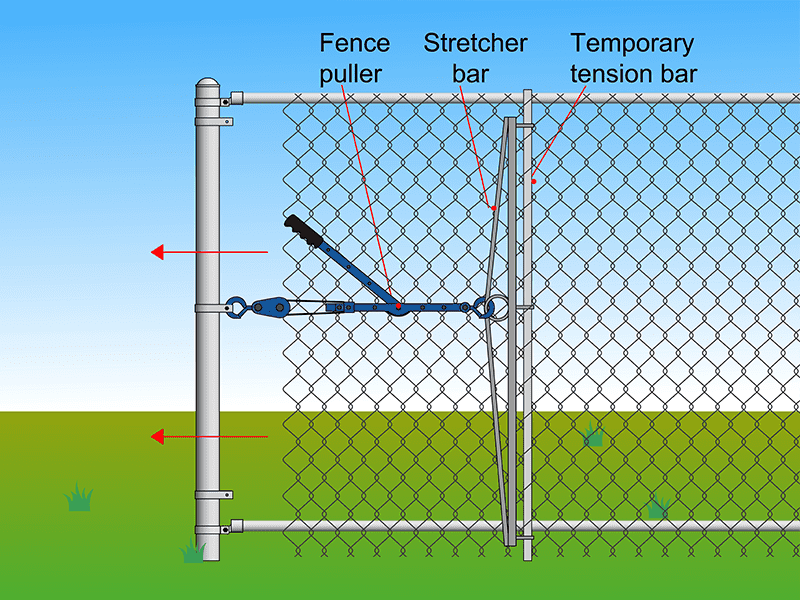
Pull the mesh roll tight along the length of the fence removing any slack. At this point you only need to remove slack, you are not permanently tightening the fence yet.
Stretch the fence
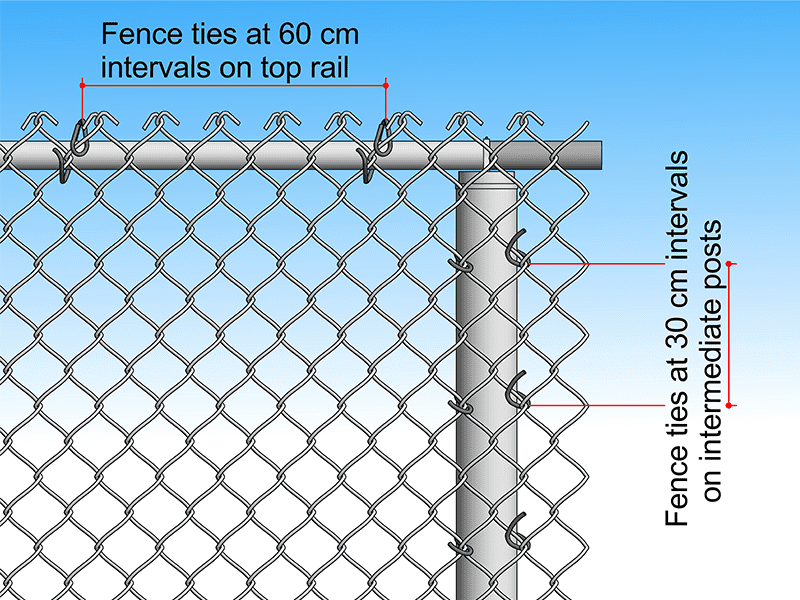
Add a few wire fence ties to attach the mesh to the top rail to fasten them tightly.
Fasten fence & top rail
Add a few wire fence ties to attach the mesh to the top rail to fasten them tightly.
Tighten chain link mesh
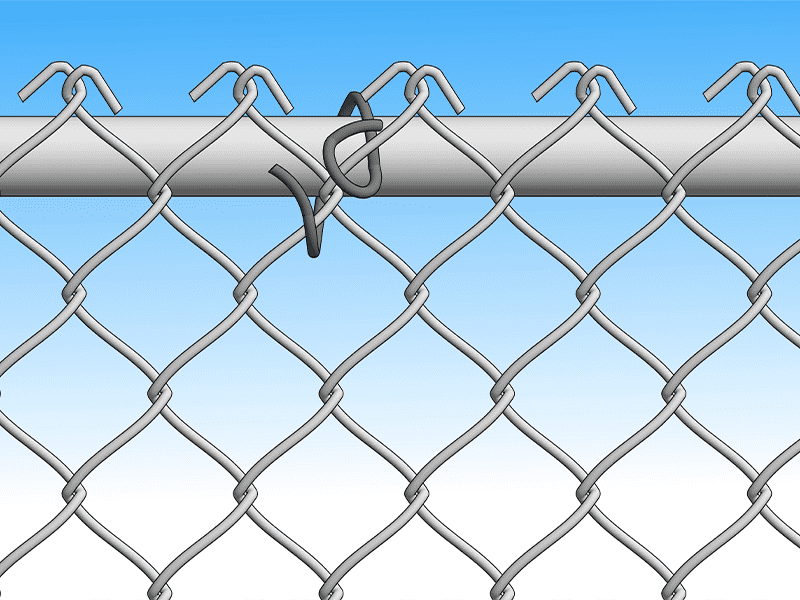
To remove the excess mesh between the tension bars and end post, open a loop at the top and bottom. Twist and pull the strand free.
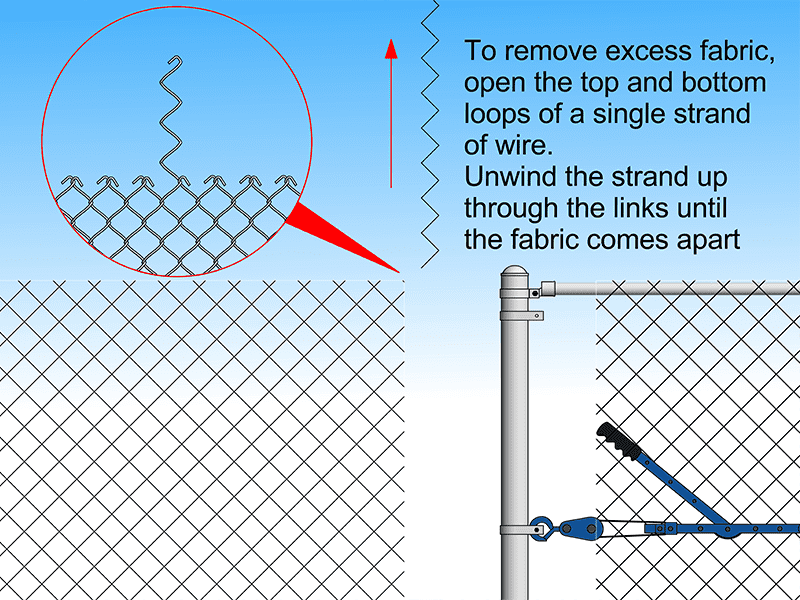
Remove Excess Mesh
When installing the hardware, leave it loose at first. You can tighten the nuts and bolts after the chain link fence is installed.
Drive caps onto the posts with a mallet. Put the posts in their holes.
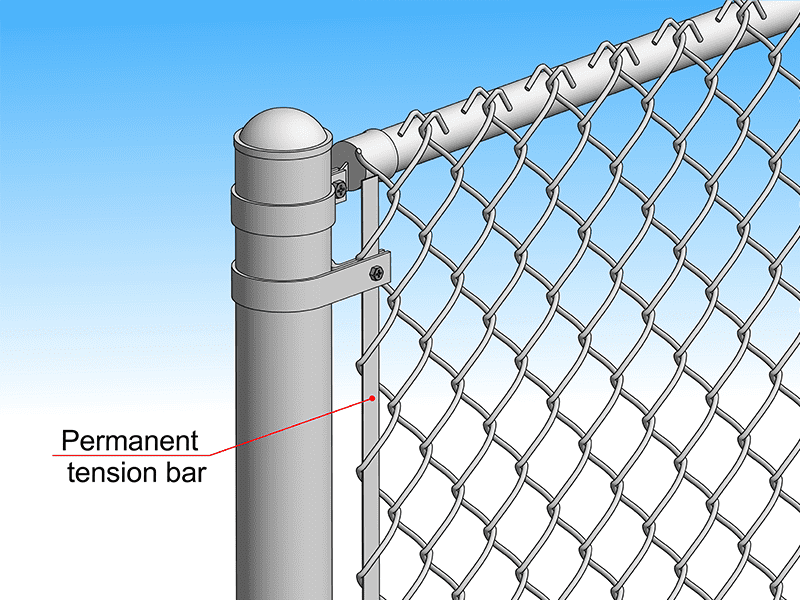
Insert permanent tension bar
Fasten fence with top rail & posts
If the fence is particularly long, particularly high or if there is a lot of pressure from wind or other environmental factors. It's better to add the tension wire in the middle of a chain link fence to provide additional support and stability.
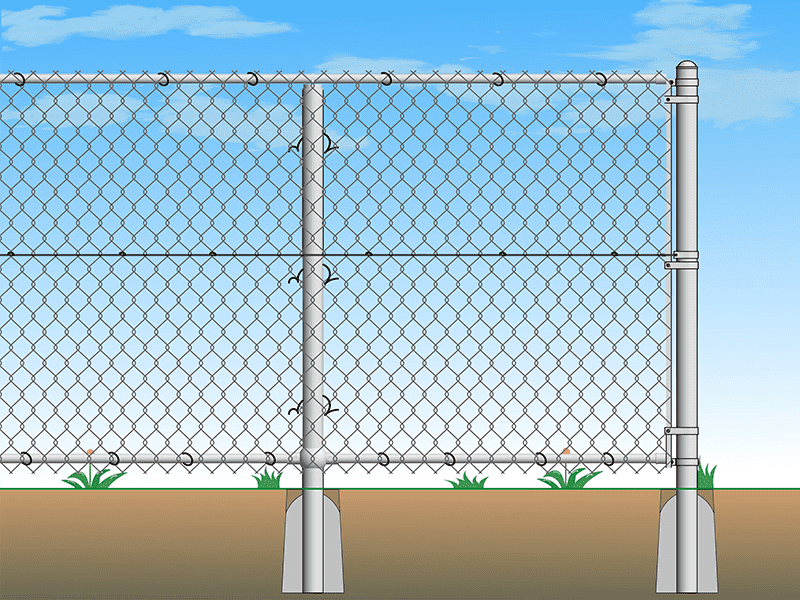
Tension wire for animal blocking
Chain link fence in park
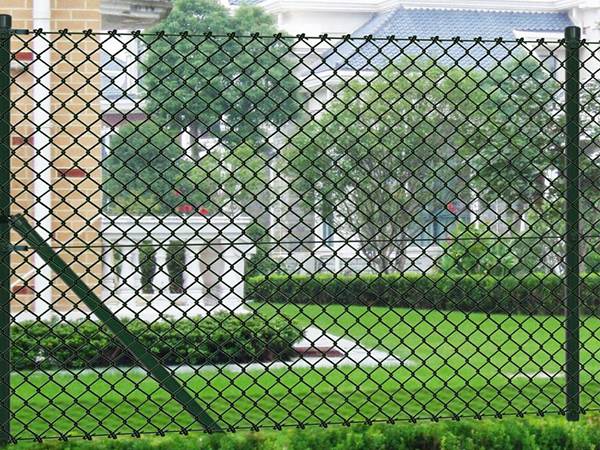
Chain link fence in garden