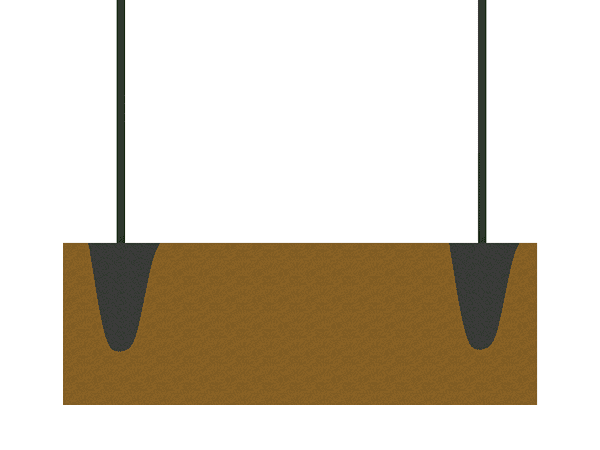
Dig-in
- Suitable for softer ground that is easier to excavate in order to create strong concrete excavation.
- Able to provide more stable support for fences in high security areas.

358 high security fence is a high-strength, high-security welded fence commonly used in power plants, embassies, research institutes, borders, prisons, military bases, and other places with high security and privacy requirements. Combined with 358 high security fence installation scenarios, we provide the appropriate installation guidance.
Check ground conditions and underground pipelines. And prepare the required materials such as 358 fence mesh, posts, clamp bars / spider clips, bolts, nuts, metal washers, levels, etc.
Check ground conditions and underground pipelines. And prepare the required materials such as 358 fence mesh, posts, clamp bars / spider clips, bolts, nuts, metal washers, levels, etc.
Choose the fixing methods of the posts according to the ground soil conditions and the need for flexibility in the installation:
Dig-in
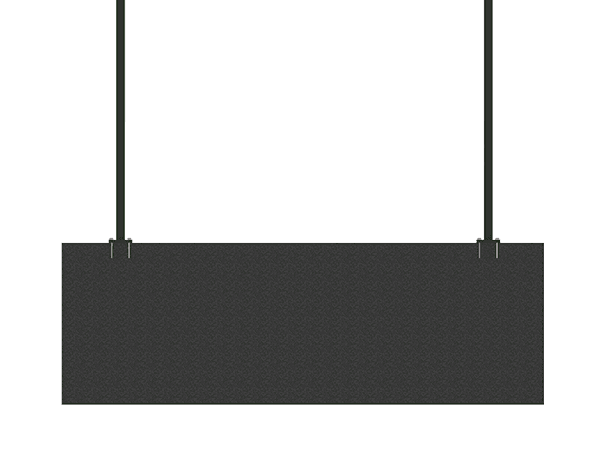
Bolt-down
Combined with the different ease of dismantling and installing the fence mesh and different structural stability, choose the fence mesh fixing method:
Clamp bar installation provides a stronger connection and the fence mesh is easier to remove from the posts. Place two fence mesh edges overlapping between the post and the clamp bar when assembling, thread the bolt through the hole in the clamp bar and the hole in the fence panel, and then place washers on both sides of the bolt. Tighten the nuts and make sure the connection is tight.
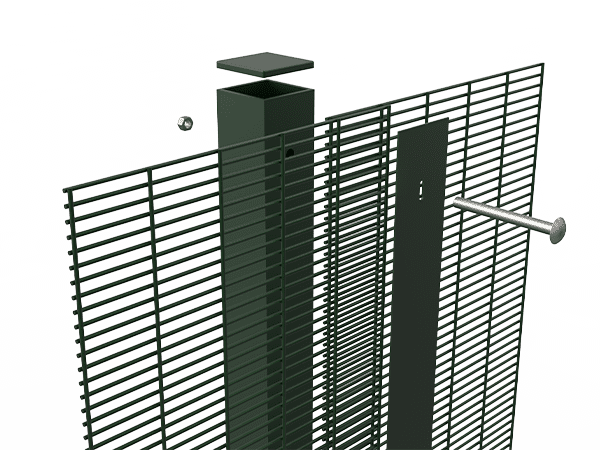
Clamp bar connection explosive view

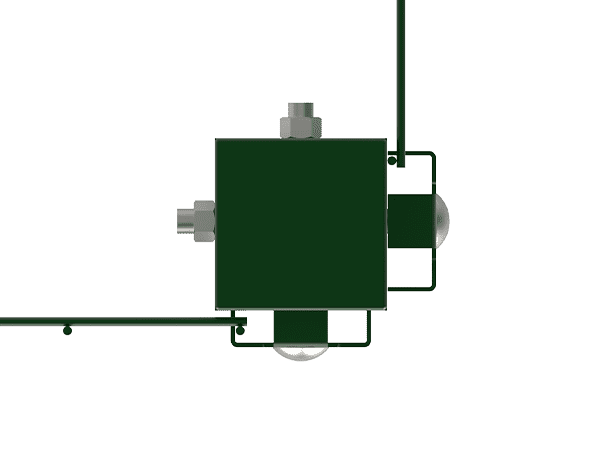
Clamp bar connection front view
When fixing the fence meshes with end posts and corner posts, the fixing methods are different:

Intermediate Post

End post

Internal corner post

External corner post
Spider clip installation is more flexible and is easier to adjust to different terrains and height fluctuations. In addition, compared to clamp bar installation, spider clip installation is more economical as it requires less material. The fence is placed in front of the post and the prepared spider clips are clamped to the edges of the two adjacent fence pieces when assembled. The fence panels are then secured by special bolts and torque screws through spider clips to keep the fence panels stable.

Spider clips connection explosive view

Front view of fence meshes secured with spider clips
When fixing the fence meshes with end posts and corner posts, the fixing methods are different:

Intermediate post

End post
Corner post
Finally, check all connection points to ensure that the fence mesh has been properly installed and make any necessary adjustments to ensure the stability and appearance of the fence.

Dig-in installation finished

Bolt-down installation finished