Installation Guidance of Reinforcing Mesh In Underfloor Heating System
Reinforcing mesh, also known as geothermal mesh, ground heating mesh panel and underfloor heating mesh or reinforcement mesh, is a component used in certain types of underfloor heating systems. Its primary function is to provide structural support and prevent movement or damage to the heating cables or pipes embedded in the floor.
When installing reinforcing mesh in an underfloor heating system, here are some general steps to follow:
Prepare the Subfloor
Ensure that the subfloor is clean, dry, and level. Remove any debris, dust, or loose materials that could hinder the proper installation of the mesh.
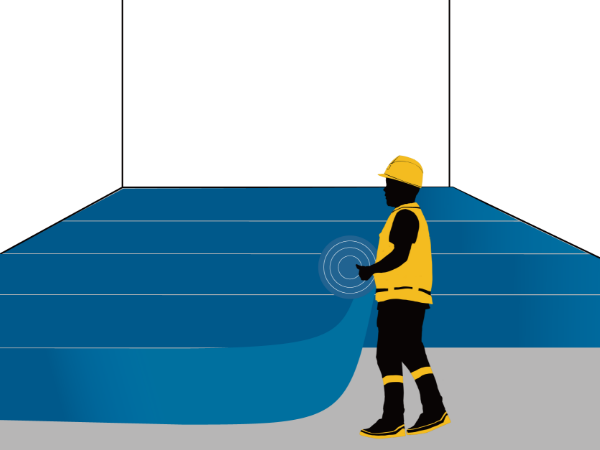
Install a vapor barrier
To contact with soil and granular fill under concrete slabs, beams and footings, and provide very low water vapor permeability
Lay down rigid foam
Lay down at least 2" of rigid foam insulation. Extruded or expanded polystyrene is the material of choice.
Install Reinforcing mesh
Measure and cut the reinforcing mesh according to the dimensions of the area to be covered, ensuring it fits tightly without overlapping.
Connect the reinforcing mesh
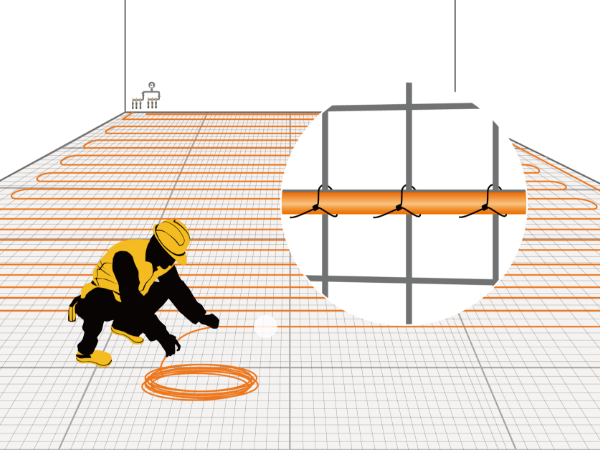
At the joint of reinforcing mesh, use tie wires or plastic zip ties to connect to fasten them at a certain spacing.
Attach heating pipes
Attach hydronic heating pipes to the reinforcing mesh or rebar using plastic zip ties.
Connect the tubing
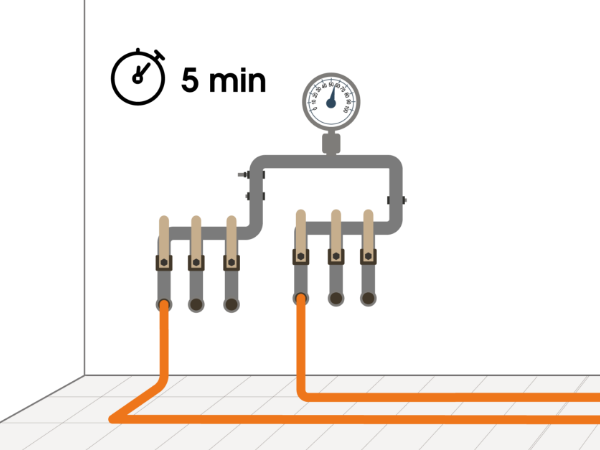
Connect the heating pipes to the manifold system, which regulates the flow of hot water from the heat source to the pipes.
Pressure test[1]
Inspect the entire system including reinforcing meshes, hydronic heating pipes and connections. Then perform a pressure test to check if the system is leakage.
Pour the screed or concrete
Release half of the air pressure before pouring to avoid concrete spray if the pipe is damaged
[1]Pressure Test Process
- Increase the system pressure to the specified level, ensuring that it reaches a minimum of 50 PSI.
- Wait for 5 minutes and check the result.
- If the pressure remains stable, the system is working as intended
- However, if the pressure drops, it may indicate a leak in the system. Begin checking the manifold to verify that it has been installed securely, using a soapy water spray to detect any escaping bubbles.
- Wait at least 12 hours after pressurization.
- If the pressure drops within 3-5 PSI during this period, the system is functioning correctly.
- In the event of a higher drop, ensure that all fittings have been sufficiently tightened.
- A drop to zero pressure confirms the presence of a leak in the system.


