Chain link fence in park

The installation of chain link fence using concrete posts is very easy. You can refer to them and make your project more smooth and efficient.

Fence Layout
Measure and mark the location of your fence with spray paint or something similar. The distance between posts should be 2–2.5 m. Measure the total length at both ends so you can order the correct length of chain link fence needed.
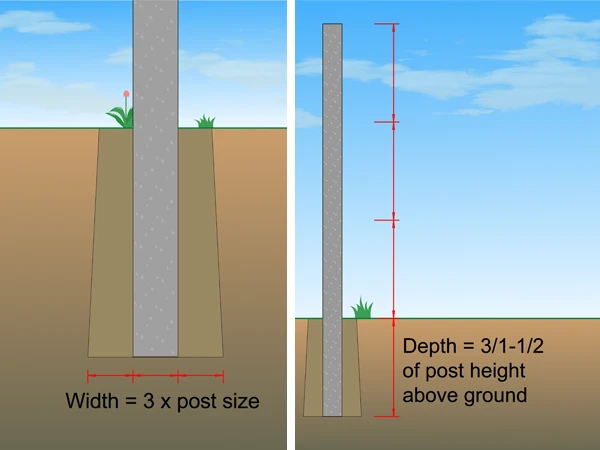
Post Hole
Use a shovel to dig a hole at each marked position. The width of the hole should be three times wider than the post, and the depth should be one-third of the post length.

Securing the post
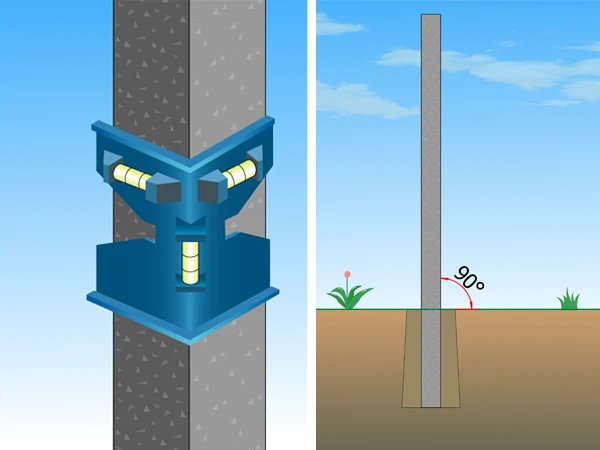
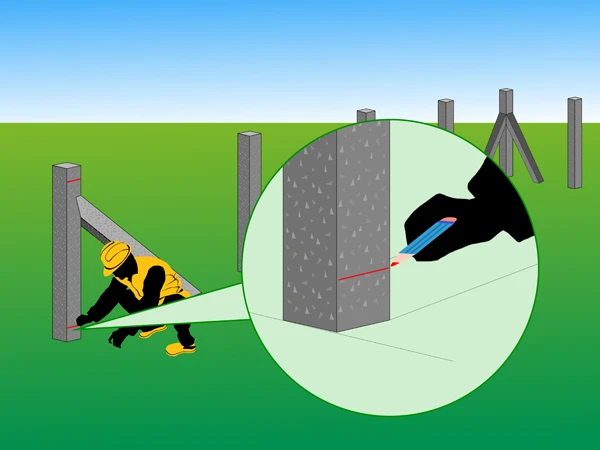
Level detection
Use a level to ensure your posts are straight, then secure them in place. This is very important; otherwise, the fence will not be straight. Once all posts are in place, wait a few days for the concrete to dry up.
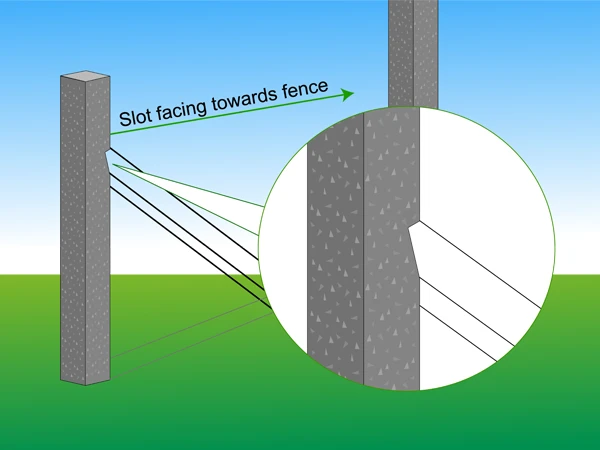
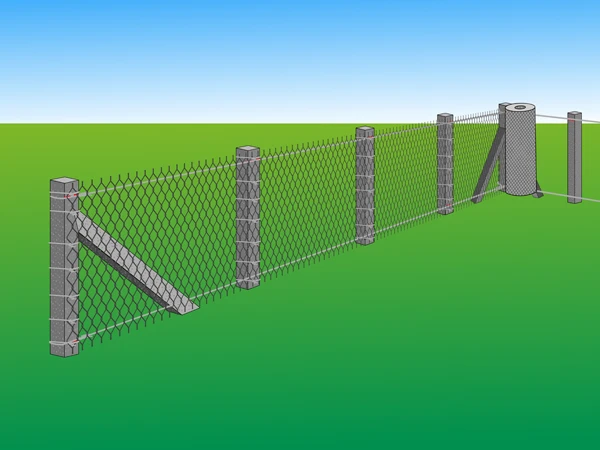
Confirm Precast Slot
The end post should have a precast slot for installing the angle support, which should face the direction of the fence.
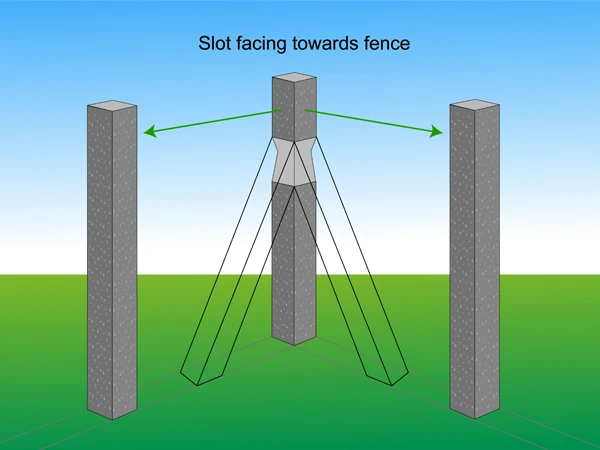
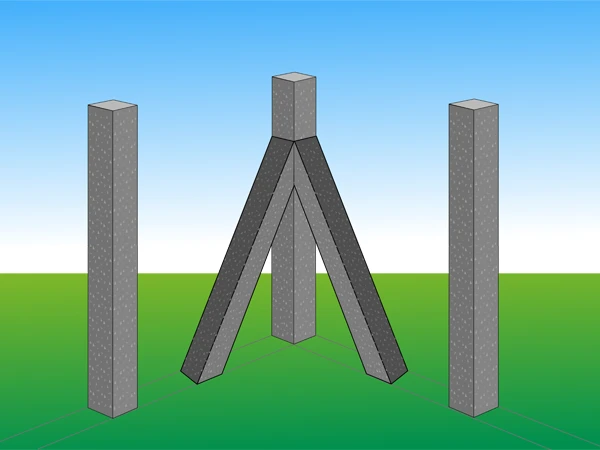
Angle Support Direction
The end post has precast slots on two adjacent sides, which should be positioned towards the two fence runs that the corner is joining.

Securing Angle Supports
First, place an angle post into the corner post's precast slot (if there is no precast slot, the angle post should typically be secured at 2/3 of the upright's height and at a 45-degree angle). After determining the correct position, dig the hole, the remaining steps are the same as in Step 3.
Install Angle Supports
Repeat Step 7 to connect the other side of the end post.
Marking Tensioning Wire Position
The chain link fence requires multiple tensioning wires for tightening:
Mark the position of each tensioning wire on all posts , ensuring they are consistent so that the tensioning wires will be level with the ground.

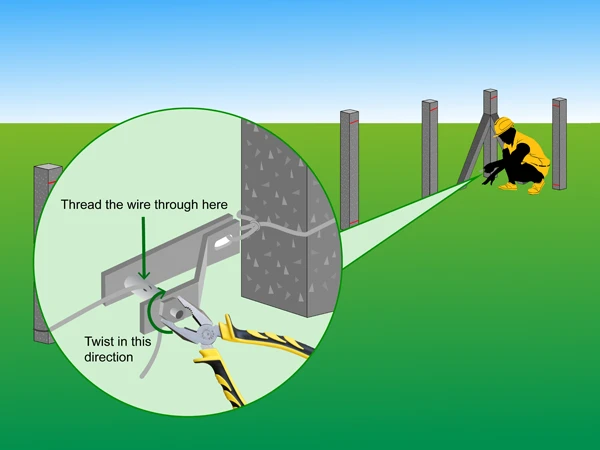
First Post Installing Tensioning Wire
Secure the tensioning wire to the end post at the lowest marked position, and hook it to the concrete post, twist and wind it around itself 4 to 5 times to ensure it maintains tension.
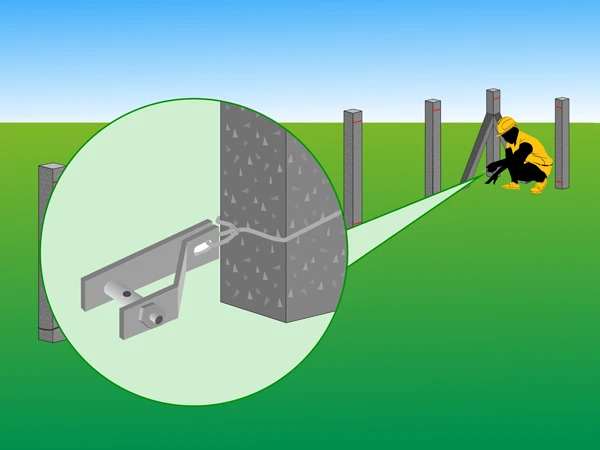
Attach the Tensioner
Use bolts and nuts to secure the tensioning wire and tensioner to the corner and end posts. (If you do not have a tensioner, please skip to Step 14)
The tensioning wire passes through the center hole of the tensioner
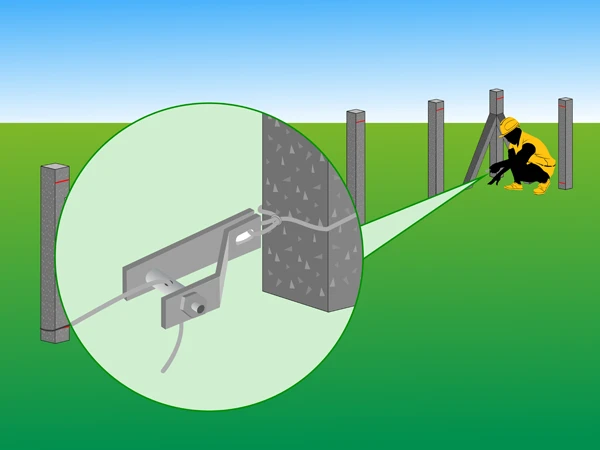
When finally cutting the tension wire, leave an extra 10 cm of length for adjustment, then pass the tension wire through the hole located at the center of the tensioner.
Fixed Tensioner
Use pliers to rotate the pin on the tensioner clockwise.
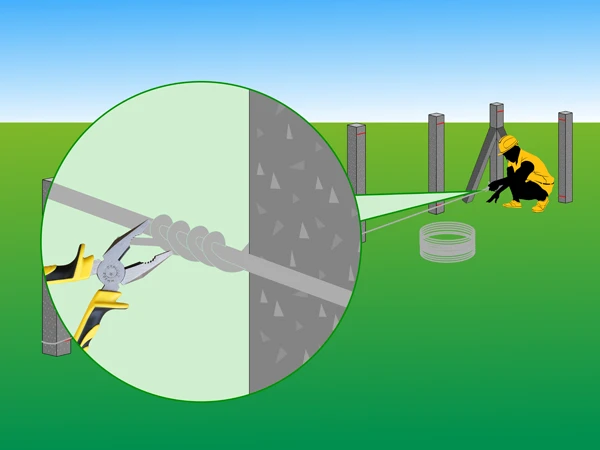
Tension wire fixed to the post
Without a tensioner, twist the tensioning wire around the post and wind it around itself 4–5 times as an alternative (note: Using this method will result in less tension compared to using a tension device).
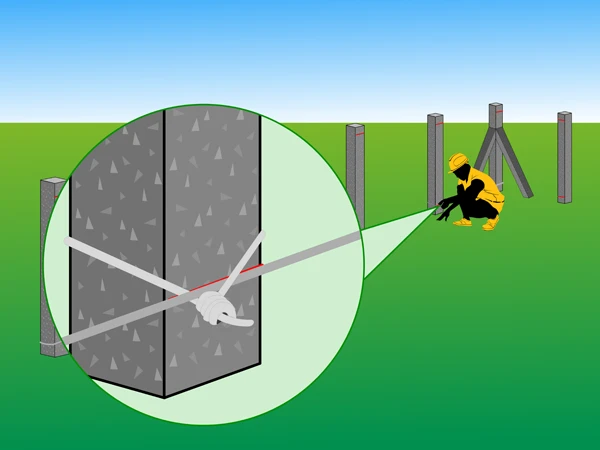
Fixing the tensioning wire to the middle post
Use wire to secure the tension wire to the middle post.

Securing the remaining tensioning wire
Repeat steps 10–13 to secure the remaining tensioning wire.
Unrolling the Mesh
Roll out sufficient mesh to cover the distance between the first two posts.
Important Notes: Ensure the roll is upright or placed on a flat and even surface with the flap facing upwards to avoid snagging! Use tie wire (or cable ties) to secure the mesh to the top of the first post.

Tension Mesh
Pull the mesh tight to stretch it at the end of the roll, and then secure it to the next post with metal wires.
Secure the Remaining Chain Link Mesh
Continue to secure the remaining section of the mesh roll as described in Steps 17–18.
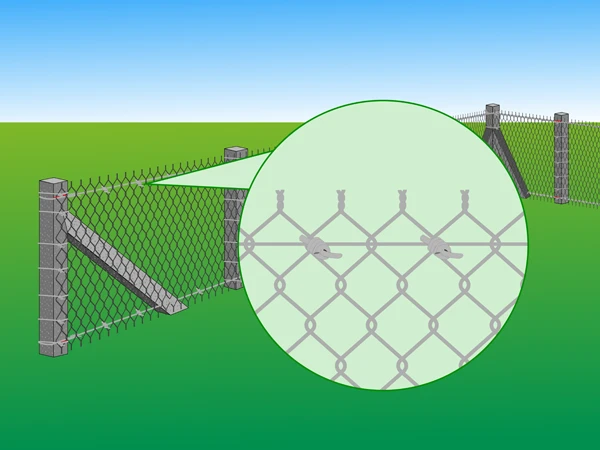
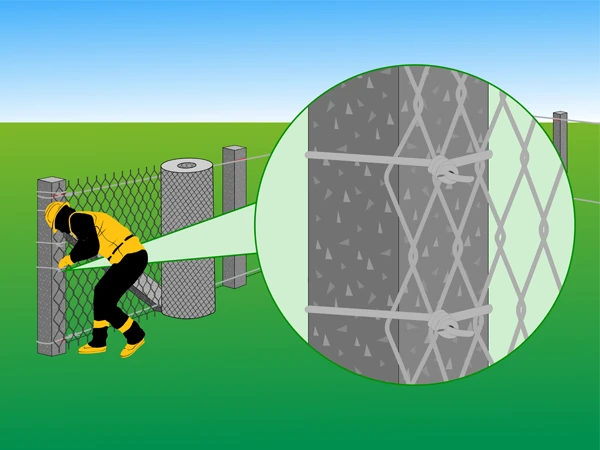
Fixing tension wire
Be sure to secure the tensioning wire to the fence at various points with metal wires to maintain the tension of the fence.
Chain link fence in park

Chain link fence in garden